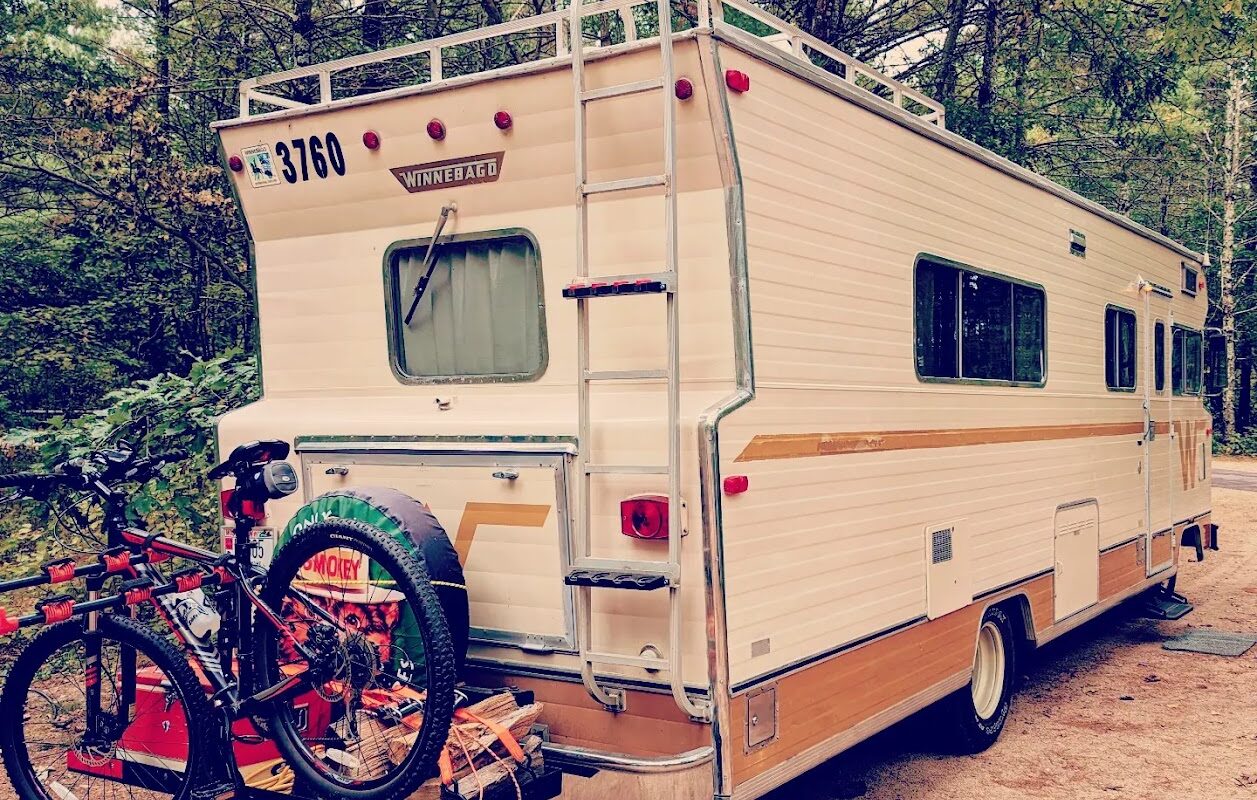
Ah, Bernice. The trusty 1971 Winnebago D24 Chieftain Motorhome. Some motorhomes are merely vehicles; Bernice feels like a family member – cranky, stubborn, but full of character. When I brought her home, the main drivetrain – a Dodge 413-1 Industrial Engine, paired with a Holley 4150C Carburetor, Loadflite A-727 Transmission, and a rugged Dana 70 rear end – had seen better days. A project was born, and I dove headfirst into a rebuild journey that would teach me more about engines, gaskets, and patience than I ever thought possible.
Let’s get under the hood!
Step One: Fuel System Revival
The first task on the list was Bernice’s fuel system. Years of neglect left the carburetor gunked up, the fuel lines cracking, and the gas tanks full of varnish. If she was going to roar back to life, a full rebuild was necessary.
Rebuilding the Holley 4150C Carburetor
The Holley 4150C carburetor is a classic, used on many 1970s big-block engines. It’s robust but prone to issues if left sitting with stale gas. I picked up a rebuild kit (Holley 37-119), which includes gaskets, O-rings, and replacement needles and seats.
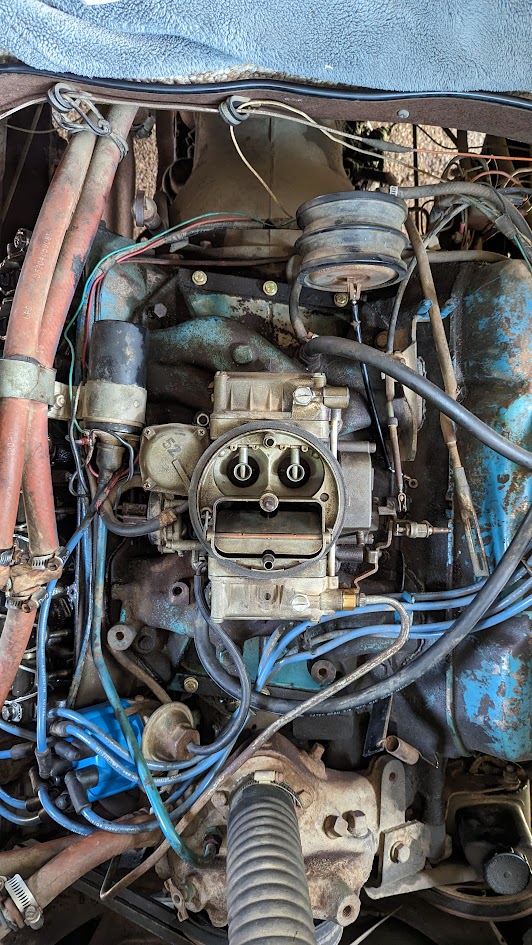
Rebuild Steps:
- Disassembly: I carefully took the carb apart, laying components on a clean workspace.
- Cleaning: Using carb cleaner and a wire brush, I cleared the years of grime out of every passage.
- Float Adjustment: I ensured the fuel floats were set to factory specifications (typically 7/16-inch drop).
- Reassembly: New gaskets, new power valve, and fresh accelerator pump diaphragm.
The result? A carburetor that looked nearly brand new and was ready to feed the 413 engine with fresh fuel.
Replacing Fuel Lines and Installing an Electric Fuel Pump
Old rubber fuel lines degrade over time, becoming brittle and cracked. I replaced them with 3/8-inch fuel hose, ensuring proper flow. To improve reliability, I swapped the mechanical pump for a 12V electric fuel pump (Holley Red Pump, 97 GPH, 7 PSI).
The electric pump upgrade improves cold starts and reduces vapor lock, common with older engines. I also added a new fuel tank switch solenoid to ensure smooth toggling between tanks.
Fuel System Tip: Always flush old gas tanks to remove varnish buildup. Use a combination of fresh gas and fuel tank cleaner, then rinse thoroughly.
Step Two: Taming the Cooling System
With Bernice’s fuel supply sorted, I turned my attention to the cooling system. Overheating is the enemy of old big blocks, and the Dodge 413-1 engine is no exception.
Flushing the Cooling System
- Drain the Old Coolant: I drained the old antifreeze (which looked more like swamp water) and removed the radiator hoses.
- Flush with Clean Water: Using a garden hose and a flush kit, I cycled clean water through the radiator, block, and heater core until it ran clear.
- Refill with Proper Coolant: I used a 50/50 mix of Prestone Green Antifreeze and distilled water. The Dodge 413 holds 19 quarts of coolant, so it’s a hefty refill.
Cooling System Tip: Inspect all hoses for cracks or soft spots. A failing hose can leave you stranded on the side of the road.
Step Three: Engine Head Gasket Replacement
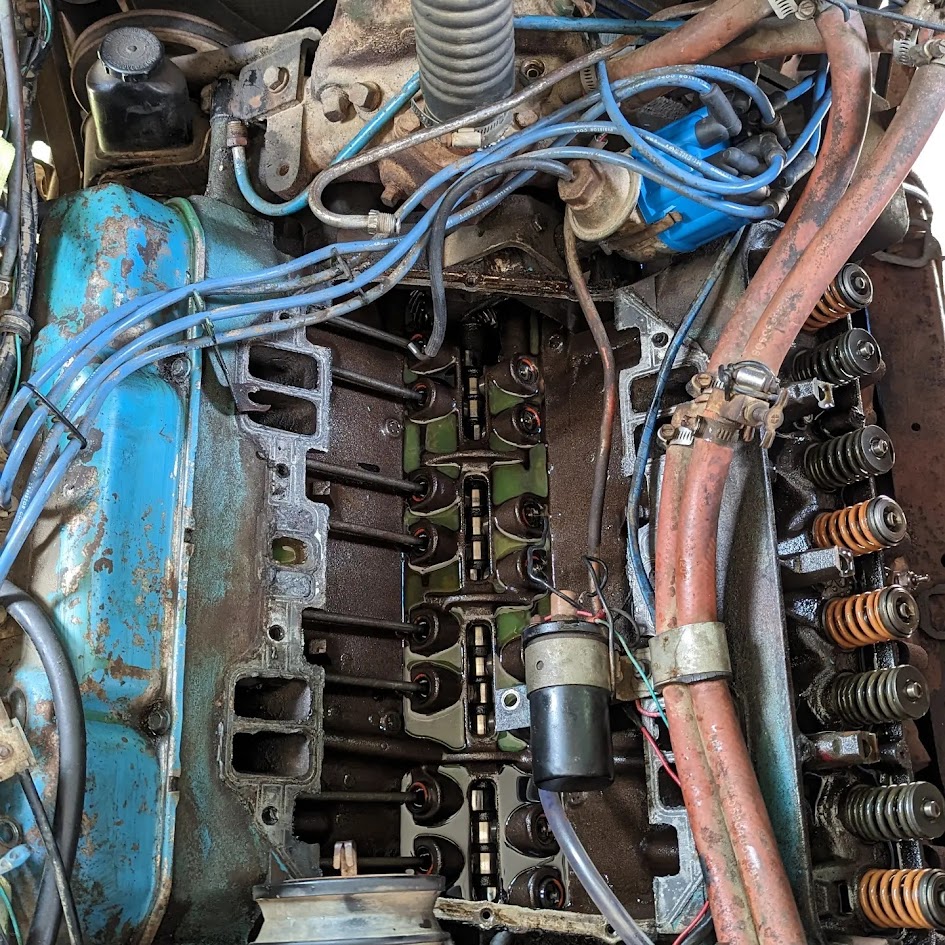
A big milestone in Bernice’s resurrection was replacing the head gaskets. Leaky gaskets can cause coolant to seep into the combustion chamber, leading to misfires or worse.
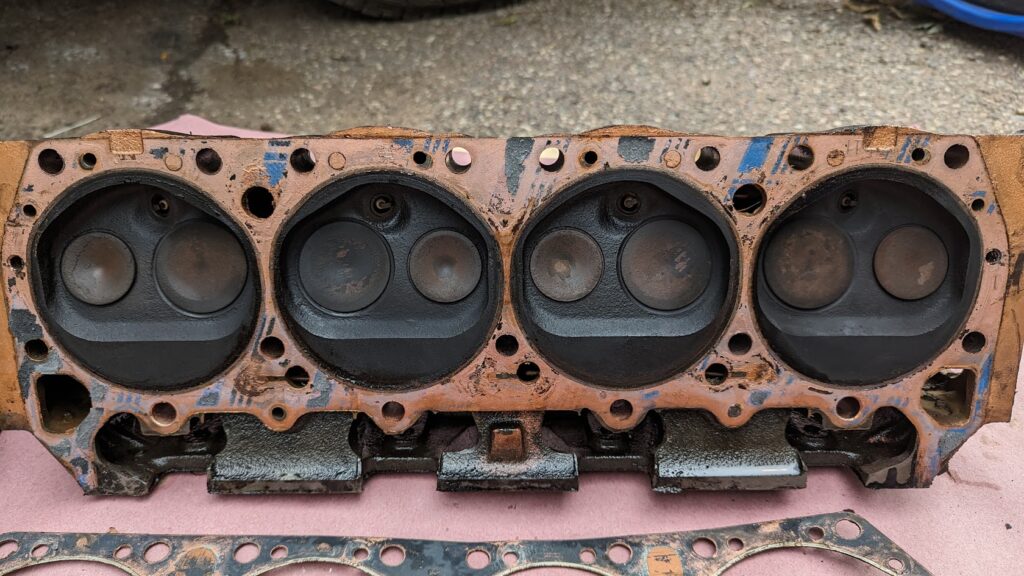
Inspecting and Replacing the Head Gaskets
- Cylinder Head Removal: I pulled the heads off the Dodge 413, exposing the pistons and combustion chambers.
- Inspection: I inspected the cylinder walls for scoring and checked the heads for warping (using a straightedge and feeler gauge).
- New Gaskets: I installed Fel-Pro 8553PT head gaskets, ensuring proper alignment and torque sequence.
- Reassembly: Torquing the head bolts to 70-85 lb-ft (per factory specs) in three steps sealed everything up tight.
Head Gasket Tip: Always torque bolts in the specified sequence and steps to avoid uneven pressure that can lead to warping.
Step Four: Oil System Overhaul
Oil is the lifeblood of any engine, and Bernice’s Dodge 413-1 deserved a full refresh.
Replacing Oil Pan Gaskets and Adding New Oil
The oil pan gasket was seeping, so I dropped the pan, cleaned the mating surfaces, and installed a Fel-Pro OS13260T gasket. I also cleaned out years of sludge from the bottom of the pan.
For oil, I opted for Valvoline VR1 Racing Oil (SAE 20W-50). This oil includes extra zinc (ZDDP), essential for protecting flat-tappet camshafts like the one in the 413. The engine holds 6 quarts of oil, including the filter.
Oil Tip: Always replace the oil filter. I used a Fram PH8A filter, which fits perfectly and ensures clean oil circulation.
Step Five: Transmission Fluid and Filter Replacement
The Loadflite A-727 Transmission is legendary for its durability, but clean fluid and filters are critical.
Transmission Service
- Drain the Old Fluid: I dropped the transmission pan and let the old Type A fluid drain.
- Replace the Filter: The transmission filter sits inside the pan. I replaced it with a new one (WIX 58847).
- Refill with Fluid: The Loadflite A-727 takes 8 quarts of Dexron III ATF.
Transmission Tip: Always check the level while the engine is running and the transmission is in neutral.
Step Six: Rear End Inspection and Gear Lube
The Dana 70 rear end is as robust as they come, but regular gear oil changes are key to longevity.
Inspecting Gears and Replacing Rear End Lube
- Drain the Old Gear Oil: I removed the rear differential cover to let the old 90-weight lube drain out.
- Inspect the Gears: No chipped teeth or unusual wear – a good sign Bernice’s rear end had plenty of life left.
- Refill with New Gear Oil: I used Valvoline 80W-90 Gear Oil, which meets Dana 70 specs. The rear end holds 4.5 quarts.
Gear Oil Tip: Always clean the differential mating surface and use a new gasket when reinstalling the cover.
Step Seven: New Spark Plugs and Wires
No engine tune-up is complete without fresh spark plugs and wires. I installed Autolite 85 spark plugs gapped to 0.035 inches and a new set of 8mm plug wires. A quick test showed all cylinders firing strong.
The Big Moment: First Start-Up
With the fuel system rebuilt, head gaskets replaced, fluids fresh, and ignition system tuned, it was time for the big moment. I turned the key, and Bernice’s Dodge 413 rumbled to life – smooth, strong, and sounding like it hadn’t skipped a beat in decades.
The rebuilt carburetor delivered fuel perfectly, the cooling system kept the engine temp steady at 190°F, and the A-727 transmission shifted smoothly through the gears. Victory!
Final Thoughts
Bringing Bernice back to life was no small task, but it was worth every scraped knuckle and late night. The Dodge 413-1 Industrial Engine is a beast, and with proper care, it’ll power my adventures for years to come. Whether it’s replacing gaskets, flushing systems, or rebuilding classic carburetors, the key is patience and the right tools.
Now, Bernice and I are ready to hit the road, bikes on the rack and the open highway calling.
Pro Tip: Always keep a small toolbox and spare fluids on board. Old rigs like Bernice are reliable but appreciate a little extra care on long trips.
Here’s to many more miles, Bernice!
Fluid and Parts Recap
| System | Fluid Used | Capacity |
|---|---|---|
| Engine Oil | Valvoline VR1 SAE 20W-50 | 6 Quarts |
| Coolant | Prestone Green Antifreeze | 19 Quarts |
| Transmission Fluid | Dexron III ATF | 8 Quarts |
| Rear End Gear Oil | Valvoline 80W-90 Gear Oil | 4.5 Quarts |
| Fuel System | Holley Red Electric Pump | – |
| Spark Plugs | Autolite 85 | 0.035” Gap |
| Carb Rebuild Kit | Holley 37-119 | – |

